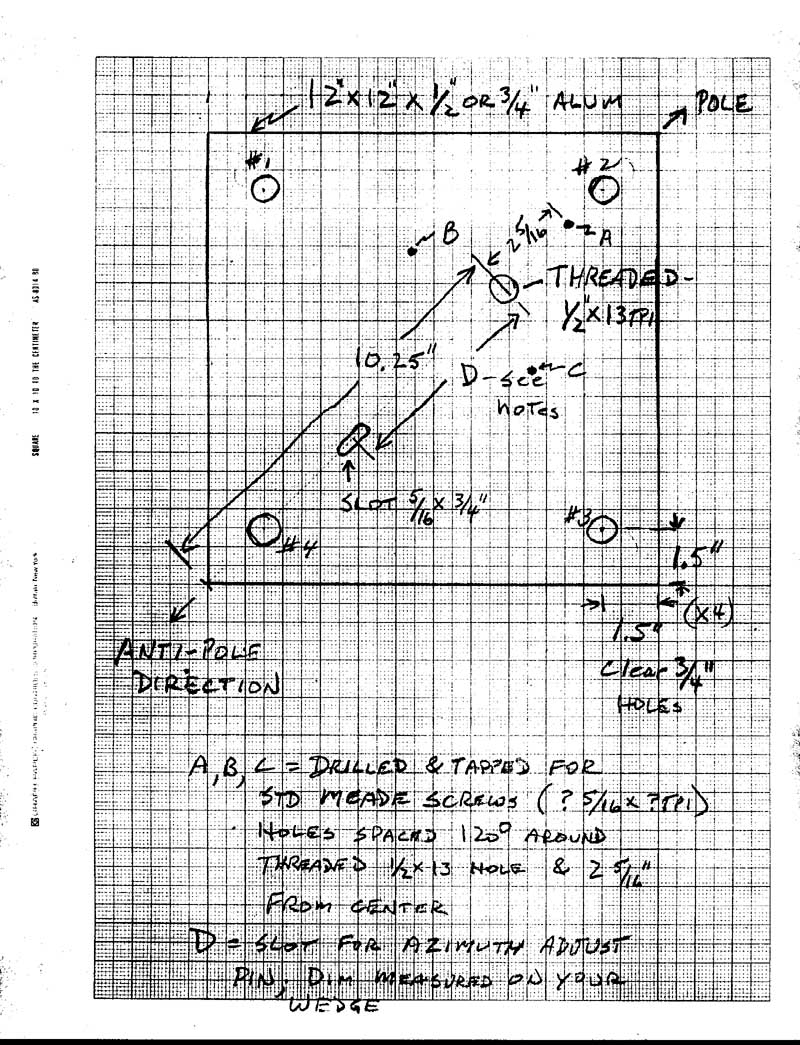
Top Pier Plate
Here is a sketch of the top plate of my two-plate system.
The bottom plate is identical in size and thickness (either ½ inch or ¾ inch
aluminum will do). The bottom plate has the same four corner holes as the top
plate and the two plates are connected via four ¾ inch all-thread studs that
are about 10 inches long but should be cut to suit the height of your setup. In
addition the bottom plate has three ¾ inch holes for the “J-bolts” used to
fasten the bottom plate to the concrete pier. The holes for these 3 J-bolts can
be placed anywhere inside the four corners where they won’t interfere with the
four corner bolts and their washers and nuts.
Be sure to lay out the base of the wedge on the aluminum
plate before drilling any of the wedge holes (pivot center, A, B, C, and azimuth
slot) so that everything will fit properly within the four corners. The washers
I have under the nuts on the corner bolts (#1-4) are about 1.5 inches in
diameter, so you should allow that much space around each of the corner holes.
My Meade Superwedge as well as a Milburn heavy-duty wedge fit comfortably within
this space. The dimension “D” for the distance between the center pivot
point of the wedge and the azimuth adjusting slot is 4 13/16 inches
on my setup
When mounting the wedge on my pier I put a short ½ inch
stud into the ½-13 threaded center pivot hole, which provides a smoother
azimuth motion when cranking the azimuth adjustment. Not absolutely necessary,
but I think it helps.
Let me know if you need anything else: mailto:katzung1@attbi.com
Return to Pier & Mounting Plate Page
Return to Observatory Page
Return to Home Page